
The main facility at a glance
This diagram shows progression landmarks, not corridor geometry or distances. Complete the active objectives before moving to the next gate.
- STARTLobby & entrancePrepare your run
- SECTOR 1Generators & Reactor 4Complete the opening objectives
- SECTOR 2Control room & LogisticsKeycard and laptop access
- CHECKPOINTSector 3 entranceVerify your badge conditions
Objective schematic only. For turns through the September Reactor 4 layout, use the dated walkthrough linked below.
Sector 1 and Reactor 4
The community location guide identifies Generator 1 as the first objective and Generator 2 as the third. The Reactor 4 sequence includes its backup generator and Basement valve. Treat those as separate interactions: finding a generator room does not mean all access conditions are complete.
Reactor 4 was reworked on September 18. Fandom marks its older Basement section as outdated. Use the current objective display and KOTLK's September 18 footage instead of following the old map corridor by corridor.
The official NUMBER_FOUR_REACTOR badge is tied to releasing the Basement valve. Before returning to the Sector 2 gate, check that the required generator and valve objectives actually registered.
Open the route through Sector 2
After the opening objectives, find the Sector 2 gate and use its entrance button. The community location pages describe the following access chain inside Sector 2:
- Control-room access: interact with the laptop on the floor in the far room off the left-hand route.
- Logistics access: use the Sector-2 Logistics Shutters control. The emergency-door shutter control opens a different route.
- Gate Control access: collect the blue keycard in the Gate-1 area of Logistics, then use the reader at the upstairs door.
- Sector 3 access: interact with the Gate Control laptop and finish the active laptop/data objectives.
- Reach the blast gate: return toward the Sector 3 approach, open the gate with its button and enter the hallway.
These are community-documented landmarks. Match the room signs and active task text to your current server; the September walkthrough's Sector 2 section starts at 9:40.
For Underequipped, the official finish is the Sector 3 entrance. The remaining Sector 3 combat and supply-cache objectives are beyond that badge's stated finish.
Legacy facility map
This community drawing is useful for recognizing the relative sector layout and the map's symbols. Its source labels it outdated; it predates the September Reactor 4 rework and should not be used as a current room-by-room route.
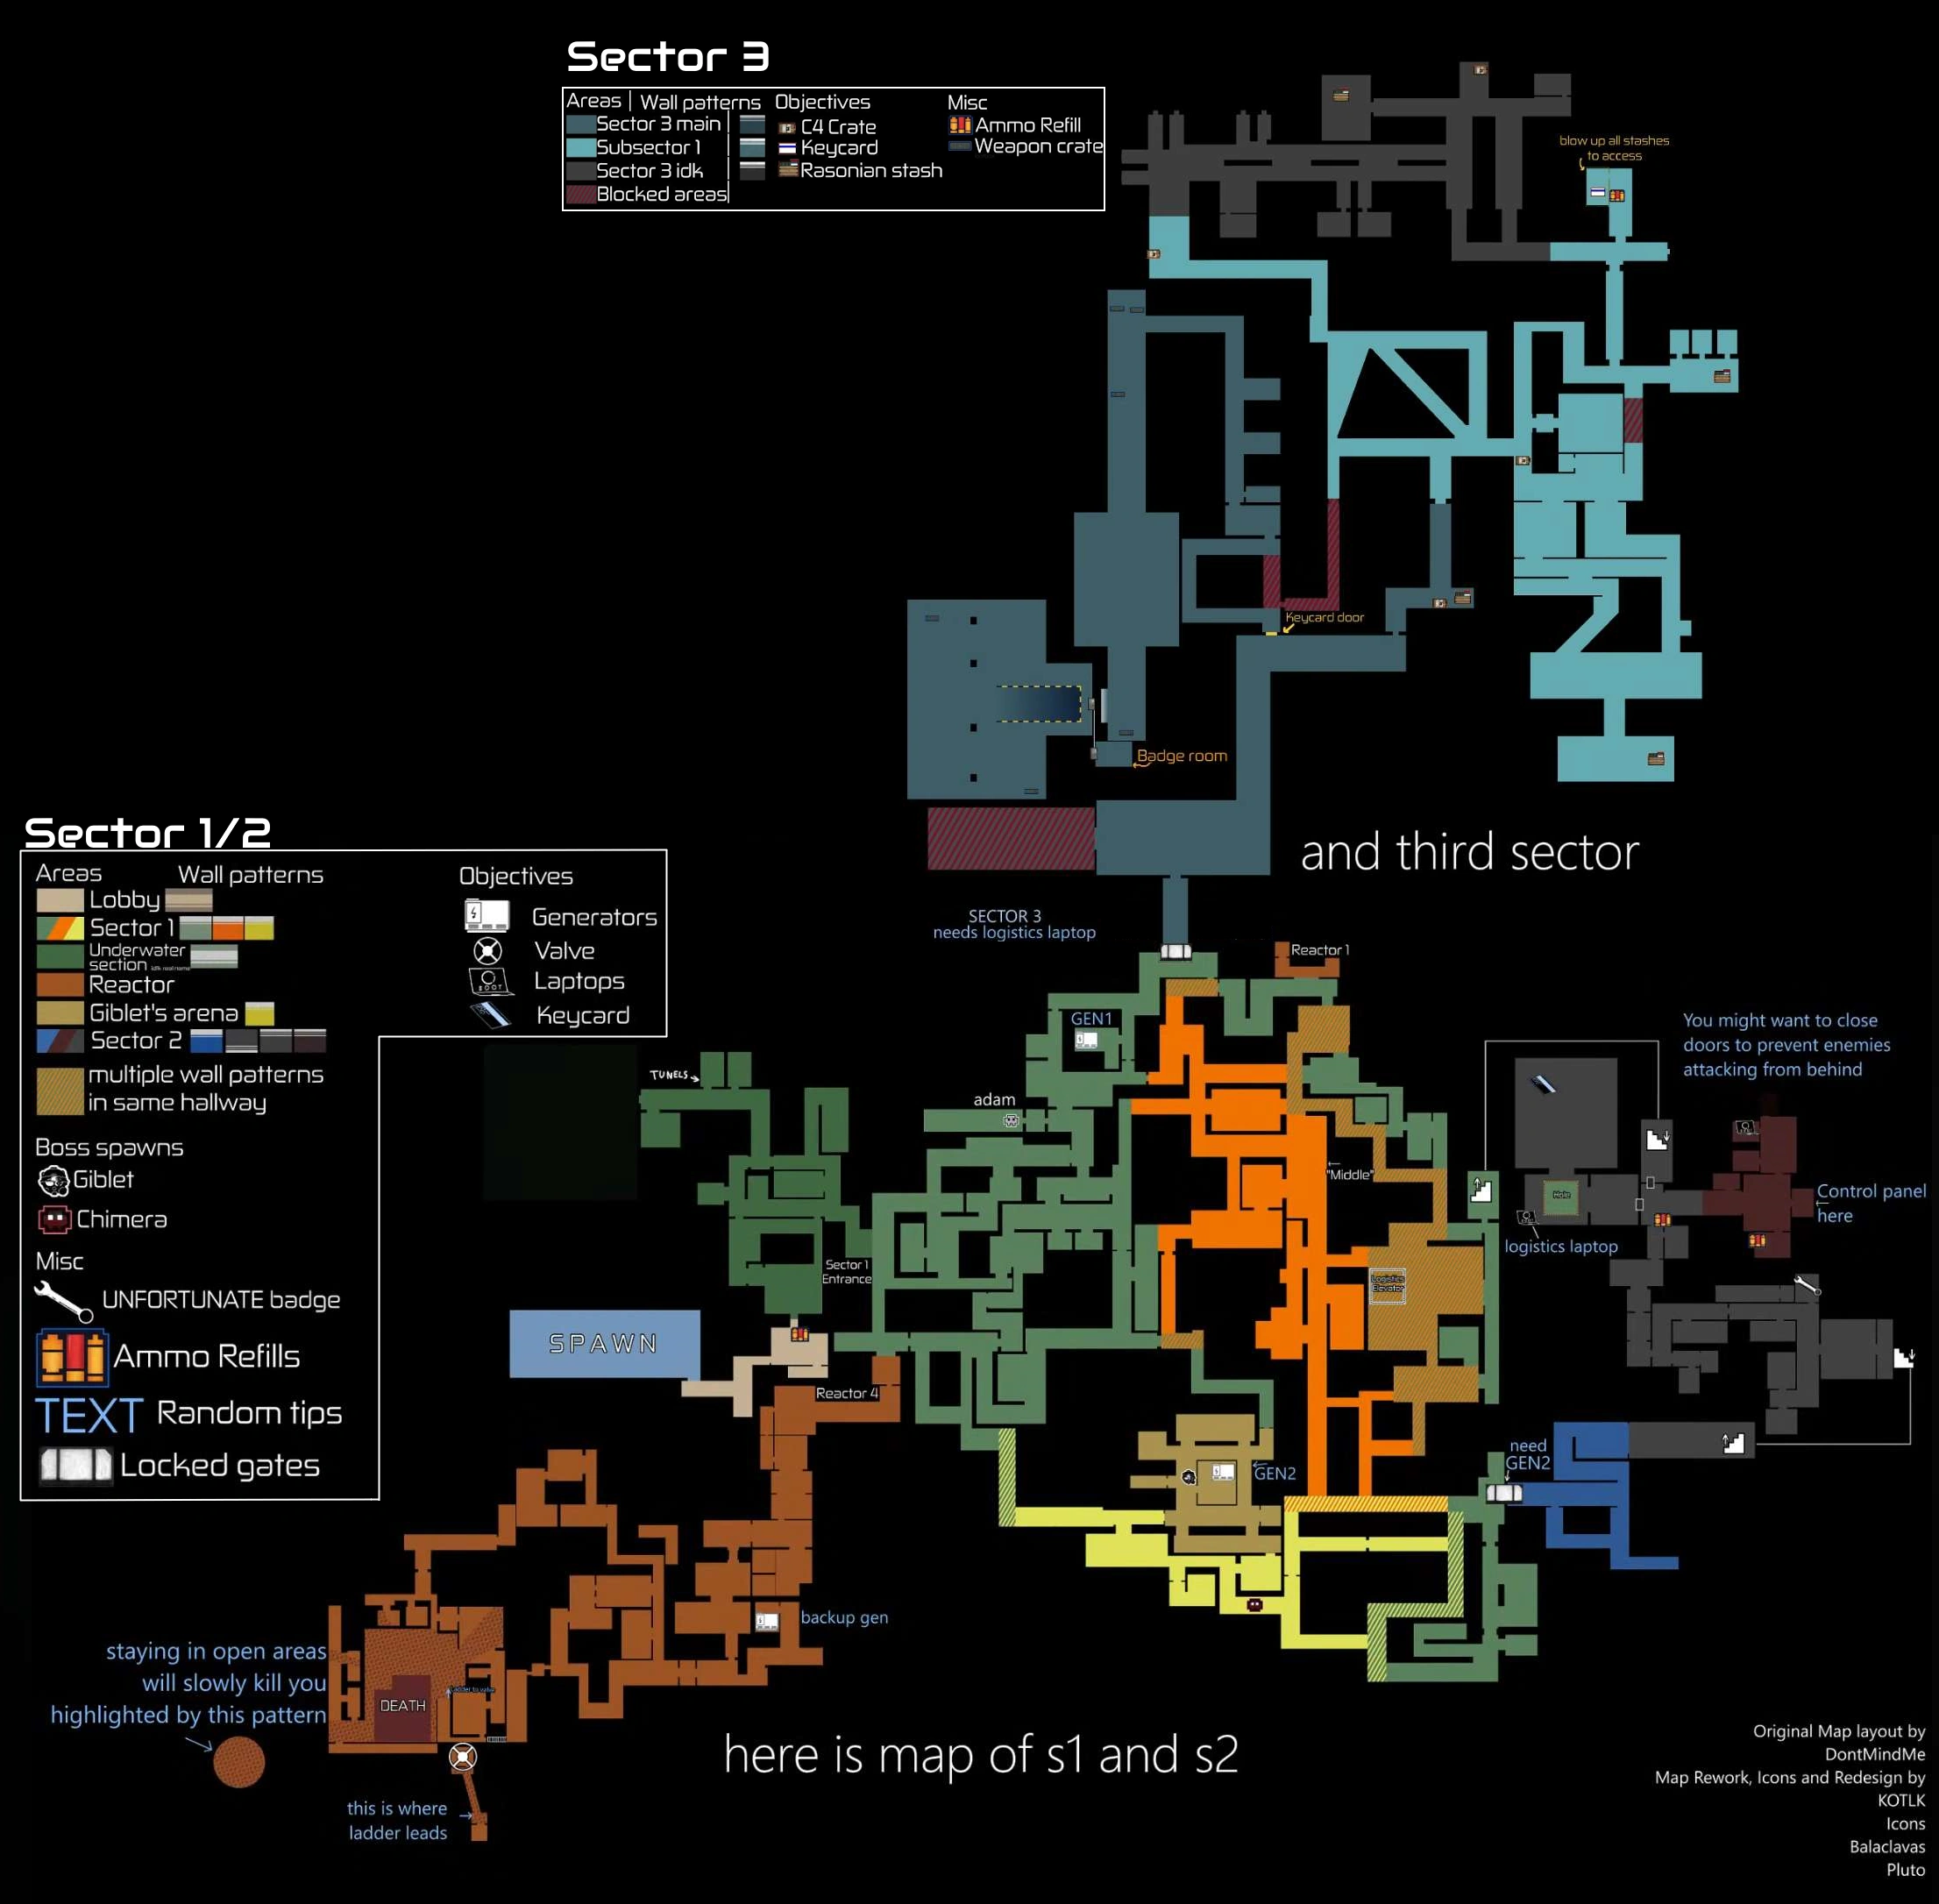
Original layout: DontMindMe. Rework, icons and redesign credited on the image to KOTLK, Icons, Balaclavas and Pluto. Reproduced unchanged from the community file page; artwork remains with its creators.

Know which route you are entering
Tunnels
The Utility door in the lobby and the black cross in the showers lead to a separate mode. Its two layers, colored keycards and coolant objectives are covered in the Tunnels walkthrough. Walking into this mode does not continue a Sector 3 badge run.
Yuri’s simulation
After obtaining entry permission, the showers-area teleporter above the Regalia display leads to Yuri's challenge. It uses an altered facility layout and a kill-count objective. Do not confuse that teleporter with the Tunnels cross.
Manhattan’s collections
Her three tasks move through Sector 2, Sector 3 and then the Basement. That final return is intentional; the quest is not a simple march toward the last sector.
Sources & verification
Checked September 23, 2026. The schematic is our rendering of the documented progression, not a surveyed map. No independent in-game navigation test was performed.
- Miraheze: Locations — objective names, access requirements and Sector 3 approach.
- Fandom: Locations — Sector 2 controls, keycard, laptop and explicit Reactor 4/map age warnings.
- KOTLK: September 18 Underequipped walkthrough — published navigation chapters.
- Community map file — credited legacy image, uploaded February 21, 2026.
- Roblox: NUMBER_FOUR_REACTOR — official valve objective.